-
By:
- ida
- No comment
th6220u2000 installation manual pdf
Welcome to the TH6220U2000 installation guide, designed to help you safely and effectively install your Honeywell programmable thermostat․ This manual provides essential steps, safety precautions, and detailed instructions for mounting, wiring, and configuring your device․ Please read carefully before starting the installation process to ensure optimal performance and functionality․ For further assistance, refer to the troubleshooting section or contact Honeywell customer support․
1․1 Overview of the Thermostat Model
The Honeywell TH6220U2000 is a programmable thermostat designed for HVAC systems, offering precise temperature control with a range of 40-90°F for heating and 50-99°F for cooling․ It features programmable scheduling, energy-saving modes, and compatibility with various HVAC systems․ The thermostat supports advanced settings like Auto Changeover and Fan Mode Cycling for optimal comfort and efficiency․
1․2 Importance of Following the Installation Manual
Following the installation manual ensures safe and correct setup of your TH6220U2000 thermostat․ Proper steps prevent damage and ensure efficiency․ Ignoring guidelines can lead to malfunctions or hazards․ Adhering to instructions guarantees optimal performance and maintains warranty validity․ This guide provides clear, step-by-step directions for a successful installation․
System Requirements and Compatibility
The TH6220U2000 operates within specific temperature ranges for heating (40°F-90°F) and cooling (50°F-99°F)․ Ensure compatibility with your HVAC system type, including conventional and heat pump systems, before installation․
2․1 Temperature Ranges for Heating and Cooling
The TH6220U2000 thermostat operates within specific temperature ranges: heating from 40°F to 90°F (4․5°C to 32․0°C) and cooling from 50°F to 99°F (10․0°C to 37․0°C)․ Ensure your HVAC system operates within these ranges for proper functionality․ Verify compatibility with your system type before installation to avoid operational issues․
2․2 Compatibility with HVAC Systems
The TH6220U2000 is compatible with conventional heating and cooling systems, including heat pumps, and supports multi-stage systems․ Ensure your HVAC system type matches the thermostat’s specifications for optimal performance․ Always verify the system ratings in this manual to confirm compatibility before installation․

Pre-Installation Steps
Before starting, disconnect power to the HVAC system and ensure the thermostat is compatible with your system type․ Understand the UWP mounting system for secure installation․
3․1 Disconnecting Power Before Installation
Always disconnect power to the HVAC system before starting installation to ensure safety․ Turn off the main power source at the circuit breaker or fuse box․ Verify the system is powered down using a voltage tester to prevent electrical shock or damage to components․ This step is crucial for safe and proper installation․
3․2 Understanding the UWP Mounting System
The UWP (Universal Wall Plate) mounting system simplifies installation by providing a secure base for the thermostat․ It adapts to various wall types and ensures proper alignment․ Use the supplied screws to mount the plate, then attach the thermostat module․ This system eliminates the need for additional tools, ensuring a hassle-free installation process․

Mounting the Thermostat
Mounting the thermostat involves separating the cover plate, attaching the base plate to the wall, and securing the UWP module․ Follow the step-by-step guide for precise installation․
4․1 Separating the Cover Plate
Begin by carefully separating the cover plate from the base plate․ Gently pry the cover plate away without damaging the wiring or mounting system․ Ensure all wires are securely held in place during this process to prevent disconnection․ Once separated, set the cover plate aside safely to avoid misplacement or damage․
4․2 Mounting the Base Plate
Mount the base plate to the wall using the provided screws․ Ensure the plate is level and securely fastened․ Align the UWP mounting system with the wall anchors for proper installation․ Verify the base plate is firmly attached to support the thermostat’s weight and ensure accurate temperature sensing and operation․ Proceed with caution․
4․3 Attaching the UWP Module
Align the UWP module with the mounting hooks on the base plate․ Gently hang the module, ensuring it clicks securely into place․ Verify the module is level and firmly attached to the base plate․ This step ensures proper functionality and accurate temperature control․ Proceed to secure the cover plate afterward․
4․4 Securing the Cover Plate
Align the cover plate with the base plate, ensuring proper fit․ Gently snap it into place until it clicks securely․ Verify the cover plate is evenly aligned and tightly fastened․ This ensures a seamless installation and protects internal components․ Proceed to the wiring and connections section after confirming the cover plate is secure․
Wiring and Connections
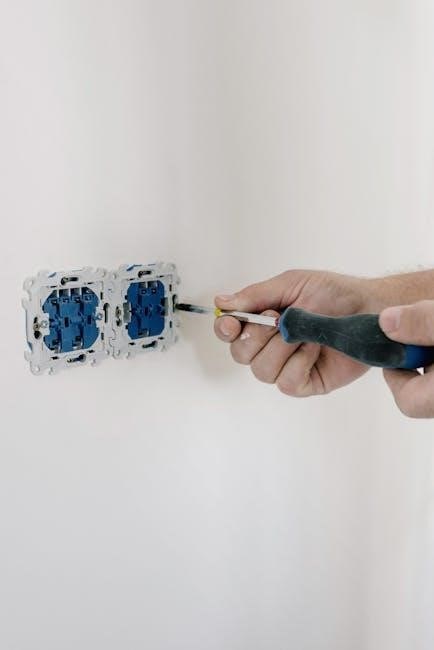
Disconnect wires from the old thermostat by depressing terminal tabs․ Connect wires to the TH6220U2000, ensuring correct terminal assignments․ Use the UWP Mounting System for secure connections․ Verify wiring compatibility before proceeding․ Insert AA batteries for backup power if required․
5․1 Removing Wires from the Old Thermostat
Before removing wires, disconnect the power supply to avoid electrical hazards․ Label each wire to ensure proper reconnection later․ Gently pull the wires out from the terminal tabs on the old thermostat․ This step ensures a safe and organized transition to the new TH6220U2000 thermostat installation․
5․2 Connecting Wires to the TH6220U2000
Match the labeled wires from your old thermostat to the corresponding terminals on the TH6220U2000․ Insert each wire into its designated terminal by depressing the tab․ Ensure all connections are secure and properly seated to avoid electrical issues․ Double-check the wiring diagram in the manual for accuracy before proceeding․
5․3 Verifying Wiring Compatibility
After connecting the wires, refer to the wiring diagram in the manual to ensure compatibility with your HVAC system․ Verify that all terminals match the required configuration for heating, cooling, or heat pump systems․ If unsure, consult the troubleshooting section or contact Honeywell customer support for clarification․
Power and Battery Installation
This section explains how to install batteries and connect primary power for the Honeywell TH6220U2000 thermostat, ensuring continuous operation and backup power during outages․
6․1 Inserting AA Batteries for Backup Power
Insert two AA batteries into the thermostat for backup power․ Locate the battery compartment, typically at the back or bottom․ Ensure correct polarity, with the positive terminal facing the correct direction․ Close the compartment securely․ The batteries provide backup power during outages․ Refer to the user manual for diagrams or additional guidance․
6․2 Understanding Primary Power Sources
The TH6220U2000 typically operates using a 24V AC power supply from your HVAC system․ Ensure the system is properly wired to provide consistent power․ Some models may also function with AA batteries as a backup, but primary power is required for full functionality․ Always verify compatibility with your HVAC system’s voltage requirements․
Initial Setup and Configuration
After installation, access the installer menu to configure system settings․ Set the system type (heat/cool) and program temperature schedules for optimal performance․ Follow on-screen instructions carefully․
7․1 Setting Up the Installer Menu
Press and hold the “Fan” and “Up” arrows simultaneously to access the installer menu․ Navigate through options using the arrows and select settings like system type and heat/cool modes․ Save changes by pressing “Hold” until confirmed․ Ensure all configurations align with your HVAC system requirements for proper functionality and performance․
7․2 Configuring System Type (Heat/Cool)
Access the installer menu and scroll to “System Type․” Select the appropriate configuration (e․g․, 2 Heat/2 Cool Conventional)․ Refer to your HVAC system specifications to ensure compatibility․ Save settings by pressing “Hold” until confirmed․ This step ensures your thermostat operates correctly with your heating and cooling system, optimizing performance and efficiency․
7․3 Programming Temperature Schedules
To program temperature schedules, navigate to the scheduling menu via the installer or main menu․ Select the desired time periods (e․g․, wake, sleep, away) and adjust the temperature settings to your preference․ Save the configuration to ensure the schedule runs automatically․ Refer to the manual for detailed step-by-step instructions or contact Honeywell support for assistance․
Advanced Features and Settings
This section covers advanced features like Auto Changeover Differential, Fan Mode Cycling, and smart app connectivity․ Refer to the manual for configuration steps and optimization․
8․1 Auto Changeover Differential
The Auto Changeover Differential feature allows the thermostat to automatically switch between heating and cooling modes based on the temperature differential set by the user․ This feature optimizes system performance by reducing manual adjustments․ Refer to the manual for specific setup instructions and configuration details to ensure proper functionality and energy efficiency․
8․2 Fan Mode Cycling
Fan Mode Cycling allows you to control the fan operation, optimizing air circulation and comfort․ The thermostat offers modes like Auto, On, and Circulate․ Auto mode runs the fan only when heating or cooling, while On keeps it running continuously․ Use Circulate to improve air distribution․ Adjust settings via the Installer Menu for customized operation․
8․3 Connecting to the Honeywell Home App
Connect your TH6220U2000 to the Honeywell Home App for remote control and enhanced features․ Download the app, ensure your thermostat is Wi-Fi enabled, and log in or create an account․ Follow in-app instructions to link your device, allowing you to adjust settings, monitor energy usage, and receive notifications from anywhere․ Ensure a stable internet connection for seamless functionality․
Troubleshooting Common Issues
Identify and resolve common issues post-installation, such as wiring problems, power outages, or connectivity errors․ Refer to the troubleshooting section for detailed solutions and diagnostics․
9․1 Checking System Operation Post-Installation
After installation, ensure the thermostat powers on and the display is functional․ Test heating and cooling modes to confirm proper operation․ Verify all wires are securely connected and the system responds to temperature adjustments․ Check for any error messages and refer to the troubleshooting guide if issues arise․ Ensure the UWP module is correctly attached․
9․2 Resolving Wiring or Connection Problems
If wiring issues arise, disconnect power and verify all connections are secure․ Check for loose or damaged wires and consult the wiring diagram in the manual․ Ensure terminals match the system type (heat/cool)․ If problems persist, review the installation guide or contact Honeywell customer support for further assistance․ Always test connections before restoring power․
9․3 Addressing Battery or Power Issues
If the thermostat shows a low battery indicator, replace the AA batteries with new ones․ Ensure batteries are installed correctly and terminals are clean․ If using a primary power source, verify the HVAC system provides sufficient power․ For persistent issues, consult the manual or contact Honeywell customer support for further assistance․
Maintenance and Upkeep
Regularly clean the thermostat to ensure proper function․ Replace AA batteries annually or when the low-battery indicator appears․ Check for software updates to maintain optimal performance․
10․1 Cleaning the Thermostat
Use a soft, dry cloth to gently wipe the thermostat’s surface, removing dust or debris․ Avoid harsh chemicals or liquids, as they may damage the device․ Regular cleaning ensures accurate temperature readings and smooth operation․ For stubborn marks, lightly dampen the cloth but ensure no moisture enters the unit․
10․2 Replacing Batteries
Insert two AA alkaline batteries into the thermostat for backup power․ Ensure correct polarity (+ and -) to avoid damage․ Replace batteries annually or when the low-battery indicator appears․ Proper battery installation ensures continuous operation during power outages, maintaining your programmed settings and system functionality․
10․3 Updating Software (If Applicable)
Periodically, update your thermostat’s software for enhanced features and performance․ Access the Installer Menu, navigate to “Software Update,” and follow on-screen instructions․ Use the Honeywell Home App to check for updates and ensure your device is connected to Wi-Fi․ Updates may improve functionality, fix issues, or add new capabilities to your thermostat․
Frequently Asked Questions
Refer to the FAQ section for common queries․ If unresolved, consult the manual or contact Honeywell support for further assistance and troubleshooting․
11․1 Can’t Find the Answer in the Manual?
If you can’t find the answer, visit the Honeywell website for additional resources or contact customer support․ Refer to the troubleshooting section for common issues or download the full installation guide for detailed instructions․ Ensure proper operation by following the steps outlined in the manual or app setup guide․
11․2 Common Installation Mistakes
Common mistakes include incorrect wiring connections, forgetting to disconnect power before starting, and improper mounting of the UWP system․ Ensure all wires are securely connected and verify compatibility with your HVAC system․ Always refer to the manual for specific instructions or contact Honeywell support if issues persist․
This concludes the TH6220U2000 installation guide․ Proper setup ensures optimal performance․ Review all steps, and refer to the manual or support resources for any additional assistance needed․
12․1 Summary of Key Installation Steps
Key installation steps include disconnecting power, mounting the base plate, attaching the UWP module, and securing the cover plate․ Proper wiring connections and battery installation ensure functionality․ Configure system settings and verify operation post-installation․ Refer to the manual for detailed instructions and troubleshooting common issues to ensure a successful setup․
12․2 Final Checks for Proper Functionality
After installation, test system operation in both heating and cooling modes to ensure proper functionality․ Verify wiring connections, power supply, and thermostat display․ Check temperature accuracy and schedule programming․ Confirm fan mode operation and system type configuration․ Address any issues promptly to ensure reliable performance and energy efficiency․
Additional Resources
Visit the Honeywell Home website to download the full installation guide and access additional support resources․ Contact customer support for further assistance and troubleshooting․
13․1 Downloading the Full Installation Guide
Visit the Honeywell Home website to download the TH6220U2000 installation manual in PDF format․ Search for your model number, select the correct guide, and follow the download prompts․ Ensure the manual matches your device for accurate instructions․ Save the document for easy reference during installation and future troubleshooting needs․
13․2 Contacting Customer Support
For assistance with your TH6220U2000 thermostat, visit the Honeywell Home website and navigate to the support section․ Use the provided contact information, including phone numbers, email, or live chat, to reach a representative․ They are available to help with installation, troubleshooting, or any questions regarding your device․ Ensure to have your model number ready for efficient support․